news/articles/article
The Complete Guide to Rebuilding WP XPLOR Forks
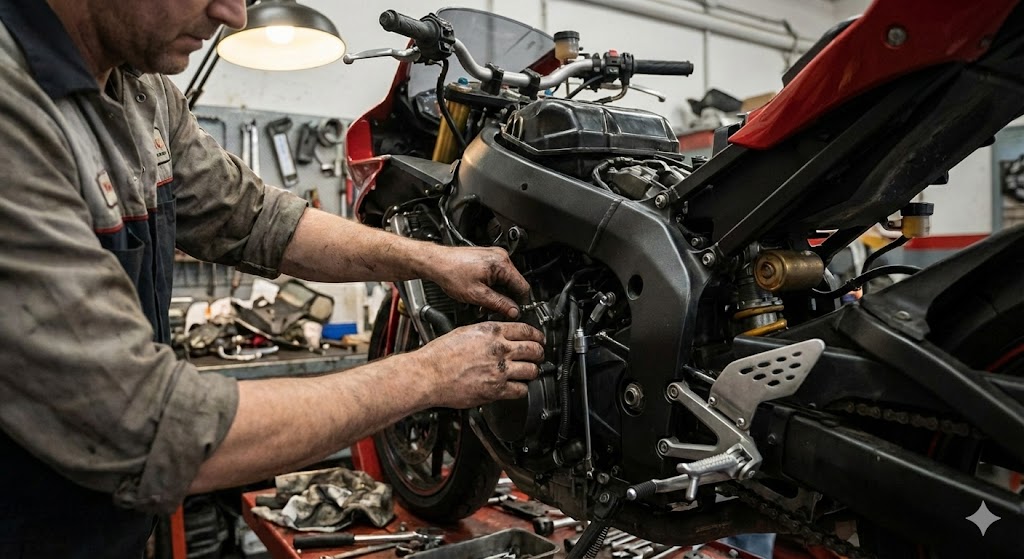
The WP XPLOR fork has become ubiquitous across KTM's enduro lineup, and by extension Husqvarna and GasGas models sharing the same platform. Its split-function design—compression damping in one leg, rebound in the other—offers genuine adjustability and, with proper maintenance, delivers years of reliable service. The factory recommends rebuilding every 50 hours, though riders frequently encountering water crossings, mud, or fine dust should halve that interval. Neglected forks don't just perform poorly; they wear internally, turning a routine service into an expensive repair. What follows is a comprehensive guide for the home mechanic with basic suspension knowledge and the right tools.
Before touching any fastener, assemble everything you'll need: approximately one litre of 4W fork oil, new dust seals and foam rings, replacement crush washers for the base valve bolts, a 48mm seal driver, a fork oil level gauge, and the WP-specific cartridge holding tool and preload adjuster socket. You'll also want a spotlessly clean workspace—suspension components are manufactured to tight tolerances, and introducing contamination defeats the purpose of fresh oil. If your garage tends toward dusty, hang plastic sheeting to create a cleaner work environment. The investment in preparation pays dividends in results.
Start with the fork still clamped in the triple clamps, loosening both caps while the motorcycle holds everything secure. The caps are typically installed with medium-strength threadlocker and require a 24mm socket—expect firm resistance initially. Once loose, remove the front wheel and brake caliper, then slide the fork legs from the clamps. If your clamp bolts haven't been serviced recently, now is the time to chase the threads with a tap and apply fresh anti-seize. These small maintenance details prevent the seized-fastener emergencies that plague neglected bikes.
With a fork leg secured in a soft-jaw vice, fully remove the cap and withdraw the spring, noting its orientation—the tighter-wound section typically faces downward. Drain the oil into a catch pan, pumping the fork through its full stroke repeatedly to expel fluid from the damping cartridge. The oil's appearance reveals much about internal condition: clean golden fluid indicates healthy components, while dark or metallic-flecked oil suggests wear requiring further investigation. If you find metal particles, plan to inspect cartridge components rather than simply replacing fluid.
The base valve bolt at the fork's bottom requires the cartridge holding tool to prevent the entire assembly from spinning. Insert the tool from the top and engage the cartridge before applying torque—stripped base valve threads are a common casualty of impatient mechanics who tried to hold the cartridge by friction alone. With the bolt removed, the complete damping cartridge slides out through the top. Inspect its body for scoring around the sealing surfaces where the internal piston travels. Light wear marks are normal; deep scratches suggest contaminated oil has been circulating.
The outer tubes need attention next. Remove the dust seal carefully using a flat screwdriver, avoiding damage to the tube surface beneath. The foam ring beneath the dust seal should be replaced at every service regardless of appearance—these inexpensive components trap debris before it reaches the main oil seal, and worn foam rings accelerate seal deterioration. Inspect the main seal by pressing your fingernail into the sealing lip; a healthy seal shows flexibility, while a damaged seal feels rigid and may show permanent compression marks. When in doubt, replace it—seals cost far less than the brake rotor replacement required after fork oil contaminates your pads.

Africa Twin vs Ténéré 700: The Middleweight Adventure Choice

Dakar 2026: Toby Price Ends KTM's Drought

Dakar 2026 Stage One: Sanders Sets Early Pace

Dakar 2026 Stage 1: Brabec Sets Early Marker
Reassembly reverses disassembly with particular attention to critical details. The oil seal must be driven squarely into its bore—a cocked seal will leak regardless of condition. Use the seal driver with even pressure, checking alignment after each hammer strike. The base valve bolt requires a new crush washer; reusing the old one virtually guarantees a slow seep that's maddening to diagnose. Thread the bolt by hand until seated, then torque to specification with the holding tool properly engaged. Oil level determines air spring characteristics—more oil means less air volume and more progressive bottoming resistance. WP specifies level as a measurement from the top of the fully compressed tube with spring removed, typically 110-120mm depending on application.
Reinstall the spring with correct orientation and thread the cap by hand before mounting in the clamps. Set fork height according to your baseline—typically 5-10mm showing above the top clamp for off-road use—and torque clamp bolts in an alternating pattern. Final cap torque happens with the front wheel installed, loading the suspension to prevent binding. Pump the forks through their stroke to distribute oil and check for seal leaks. That first ride on fresh fork oil is genuinely satisfying—everything responds as it should, a reminder of what proper maintenance delivers.